Psenner Webportal manual
Welcome as a user of the Psenner-Webshop.
Beside informations to orders and deliveries it is possible to show actual availabilities weekly.
Furthermore you can fill in orders directly and send to us or you can change existing orders.
With this brief education we will explain the "how to" to you step by step.
Inhaltsverzeichnis
1 First overview
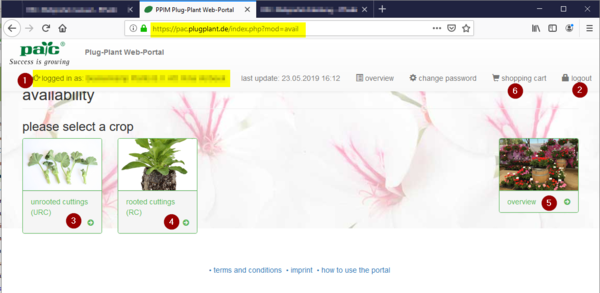
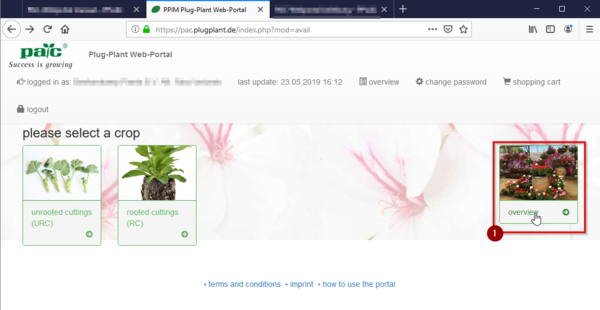
When you have registered and signed in the availabilities of delivery forms we offer will open. Furthermore you will find a button >>overview<< (5) which leads to an overview of all your orders.
In (1) you are signed in with your name. At (2) you can logout.
At (3) and (4) are named the kinds of delivery forms.
Please choose one of the delivery forms.
2 Availability
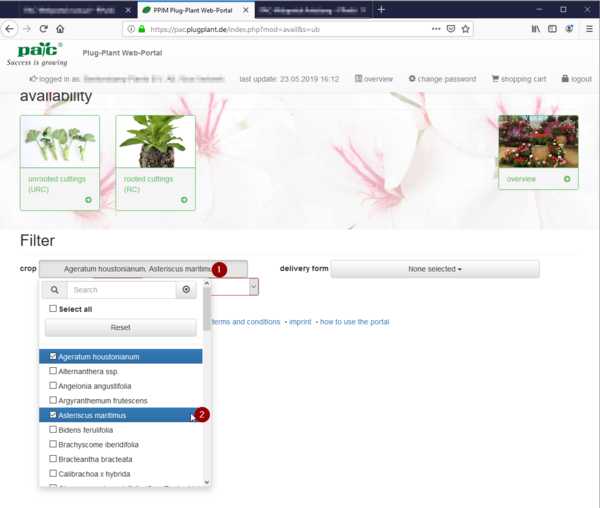
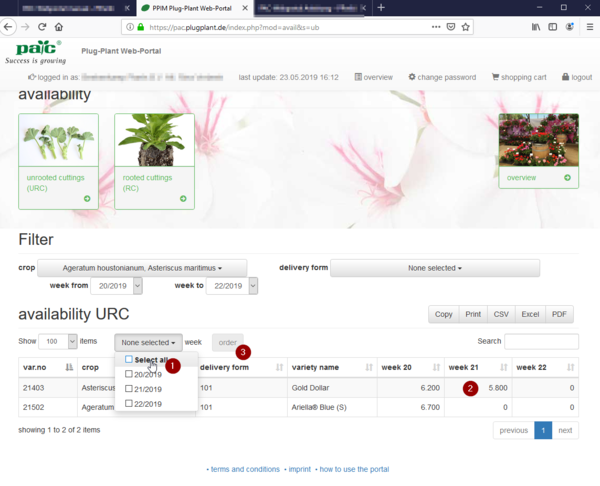
You can restrict "crop" in the lookup field (1) by choosing one special (2).
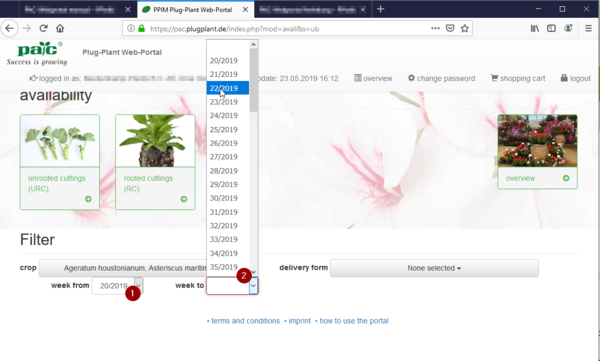
When you have filled in "week from" (1) and "week to" (2) the delivery weeks, the table will be shown.
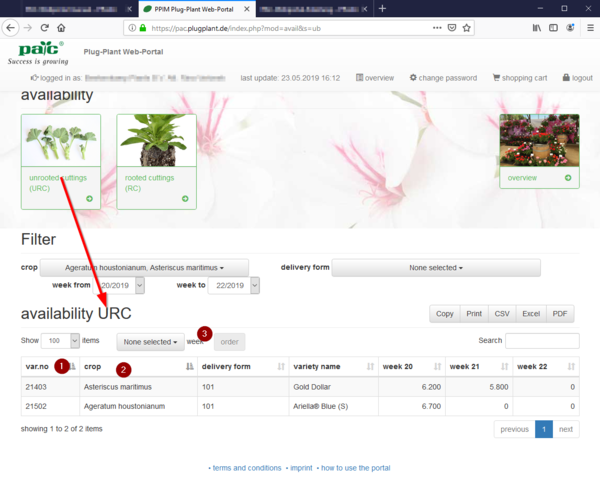
Now for each week you get an overview of the available quantities differed by article number (1) and form (2).
By clicking the symbol in the column header (1) large lists can be sorted.
2.1 write an order
You can produce an order directly with click on the button >>order<< (3).
Please choose from the weeks you want (1).
In the table you see what is available actually devided by weeks (2).
Ordering numbers with no availability only is possible for requests, not for orders.
You want to produce an order now? click the button >>order<< (3).
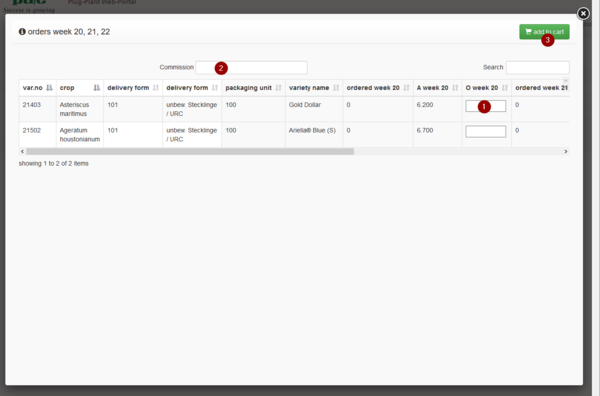
In the window that opens now you write the wanted numbers at the available varieties (1).
If you want you can fill in a commission (2).
For finishing your order please click the button >>add to cart<< (3).
2.2 The shopping cart
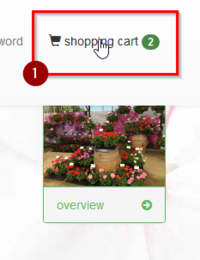
Now please click on the symbol "shopping cart" (1) top right. The quantity of your orders will be shown on the right.
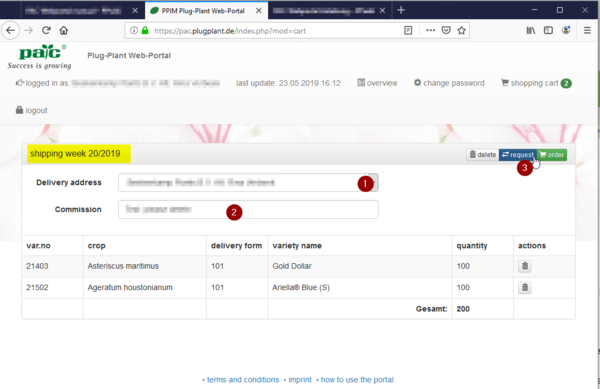
In the shopping cart each shipping week is shown separately (yellow mark).
If we have different delivery addresses of your company you can choose the one you want here (1).
Here as well you can write a special text for commission (2).
Now you can click either at >>request<< or directly at >>order<< (3).
This will be send via email directly to Elsner PAC.
Now the report "your inquiry was successfully sent." opens as well as the buttons >>show<< and >>OK<<.
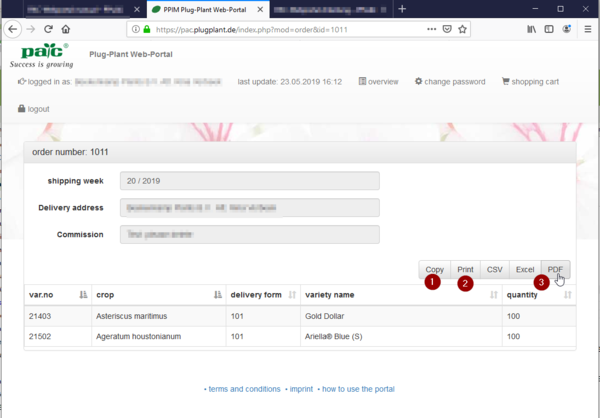
If you click at >>show<< the order will be shown clompletely. Now it could be copied (1), printed (2) or saved as Excel- or PDF-file (3).
3 Button >>overview<<
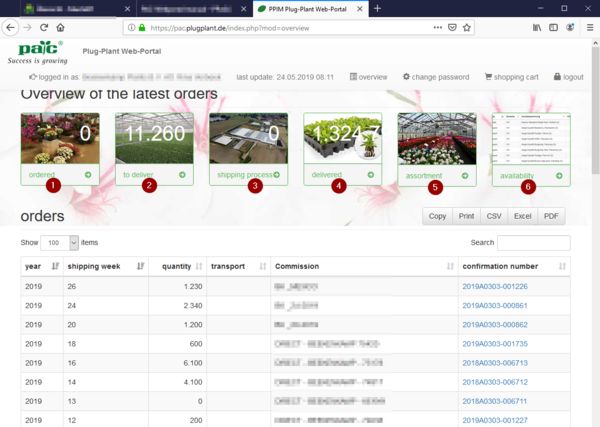
With the button >>overview<< (1) new buttons will be shown:
- - ordered,
- - to deliver,
- - shipping process,
- - delivered.
The now shown buttons divide the actual orders in:
- - ordered (1),
- - to deliver (2),
- - shipping process (3),
- - delivered (4).
Furthermore you can get an overview of our assortment (5) or via "availability" (6) change back to the start page.
3.1 ordered
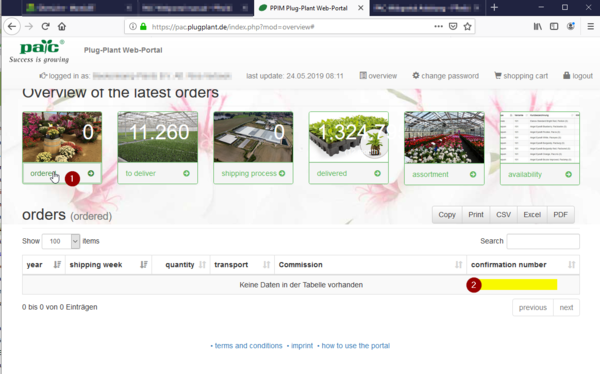
With a click at "ordered" (1) you can open a table of your actual orders.
With a click on "confirmation number" (2) you can have a look at the details of a special order.
3.2 orders to deliver
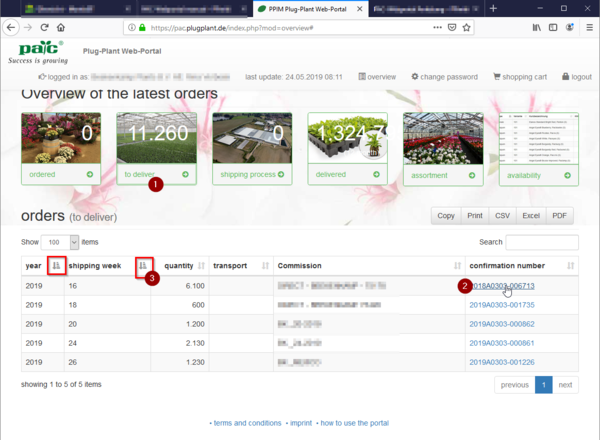
By clicking "to deliver" (1) you get an overview of the orders which are still in production.
In all those overview windows it is possible to choose the order directly by clicking the "confirmation number" (2). Here you can make corrections in the order details.
By clicking the sort-button (3) you can sort by each column up or down.
3.2.1 order details
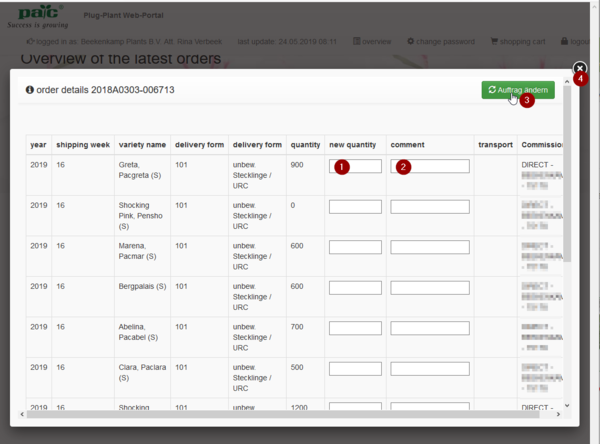
In the window "order details" you can change the quantities yourself later (1) and give appropriate reasons (2).
These changes can be fixed by clicking the button >>Auftrag ändern<< (3) (= change order) before you close the window again (4).
Orders in shipping process or delivered can not be changed any more.
3.3 Shipping process
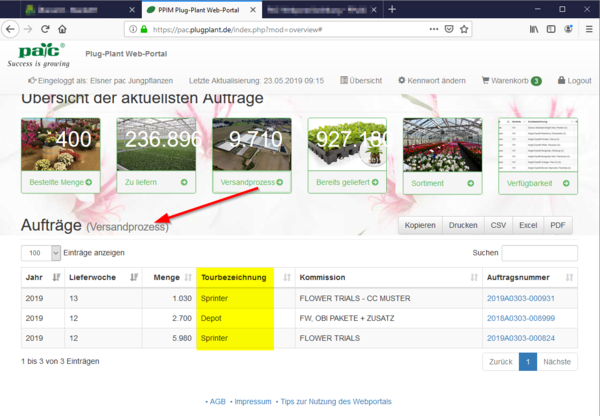
For orders in shipping process the "Transport" name will be added.
3.4 assortment
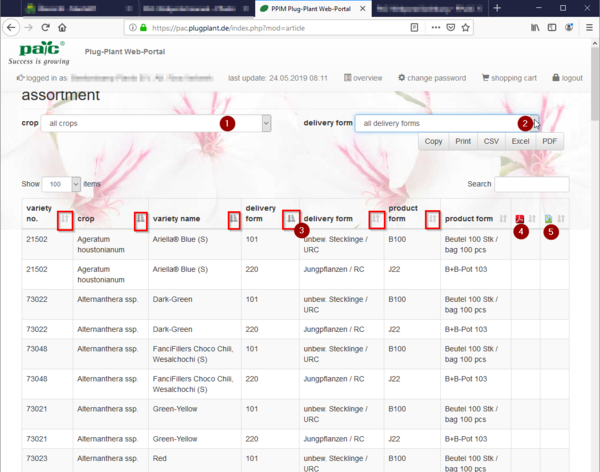
In the table "assortment" you get an overview of our offers. You can search closer in lookup-windows by "crop" (1) and "delivery form" (2).
In this table you have the possibility, too, to sort each column by using the (red framed here) sort-images (3) that you can find your wanted selection faster.
We offer short cultivation descriptions for some crops. You can download them via the PDF-symbol (4).
Sorry, by now this is available only in the german version.
The image-Icon (5) opens a picture of the variety in this row.
4 Exporting the data files
Below the menu-buttons on the right you find different possibilities to export your data files.
4.1 as PDF
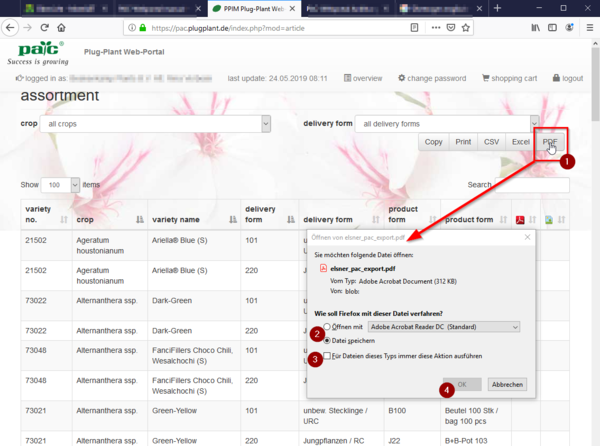
The >>PDF<< button (1) opens a popup-window to transfer the actual table into a PDF file.
You can choose (2) between "save directly" or open in Adobe Reader first to have a look on the dates and then save with another name.
Surplus you can set a hook to choose this way for every PDF file (3).
To finish you click >>OK<< (4).
4.2 in Excel
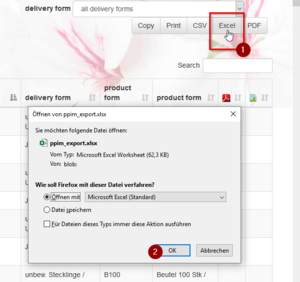
With the >>Excel<< button (1) a similar window like for the PDF one opens. When you confirm with mit >>OK<< (2), an Excel file opens where all dates are transfered in.
You have to give the files free to edit the dates.
4.3 Copy
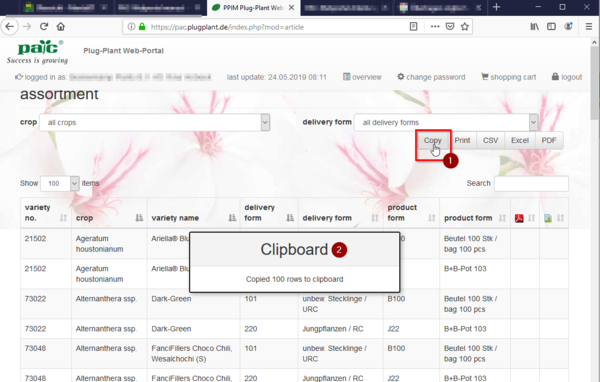
The button >>copy<< (1) corresponds to the Windows-command Strg + C without marking the lines in advance.
For a short moment you will see the note "Clipboard" (2).
As well in table calculation software as in text software you now can use the command "Insert" – e.g. Strg + V – or "right mouse button" and "insert" to insert the clipboard dates.

