PAC-Webportal manual
Welcome as a user of the PAC-Webshop.
Beside informations to orders and deliveries it is possible to show actual availabilities weekly.
Furthermore you can fill in orders directly and send to us or you can change existing orders.
With this brief education we will explain the "how to" to you step by step.
Inhaltsverzeichnis
1 Registration
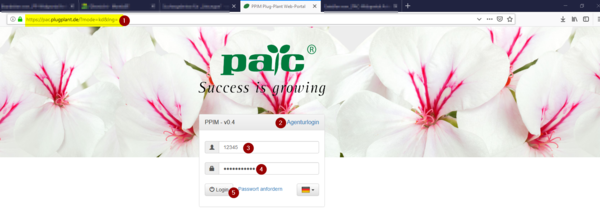
First you open the following page in your browser (1):
www.pac.plugplant.de
At (2) you find either "AgenturLogin" or "KundenLogin".
- with "KundenLogin" (= client login) you as our client can log in yourself. Here you find your actual orders, check availabilities or make corrections directly.
- with "AgenturLogin" (= agency login) you as our agent can choose us as supplier in another field. On site of your client you can look in or write orders and availabilities.
At (3) you fill in your name and confirm with your password (4). Then you can sign in with click at button >>Login<< (5).
2 First overview
When you have registered and signed in the availabilities of delivery forms we offer will open. Furthermore you will find a button >>Übersicht<< (5) which leads to an overview of all your orders.
In (1) you are signed in with your name. At (2) you can logout.
At (3) and (4) are named the kinds of delivery forms.
Pleas choose one of the delivery forms.
3 Verfügbarkeit - Availability
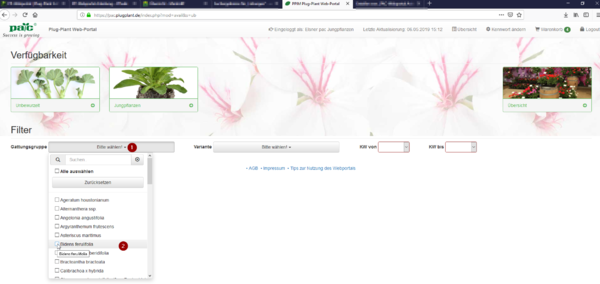
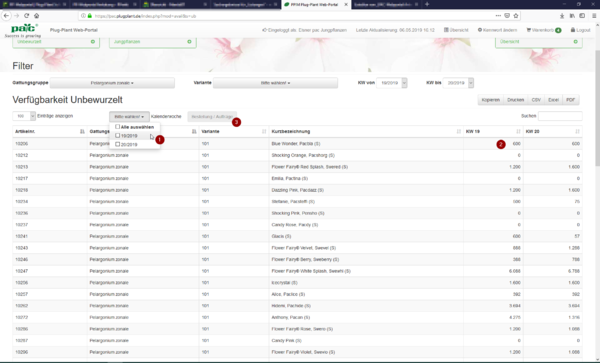
You can restrict "Gattungsgruppe" (= genus group) in the lookup field (1) by choosing one special (2).
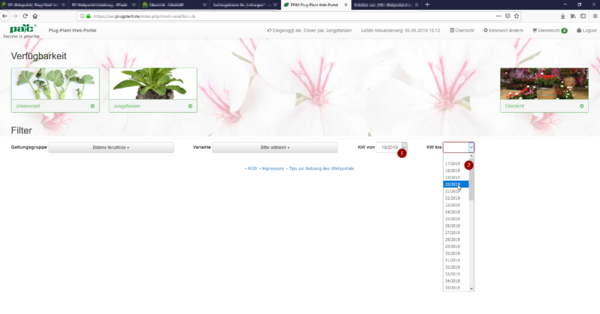
When you have filled in "KW von" (1) and "KW bis" (2) the delivery weeks, the table will be shown.
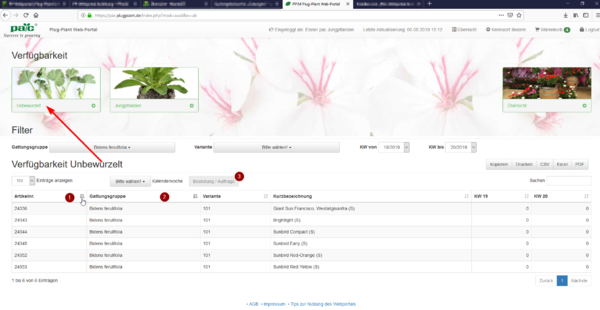
Now for each week you get an overview of the available quantities differed by article number (1) and form (2).
By clicking the symbol in the column header (1) large lists can be sorted.
3.1 write an order
You can produce an order directly with click on the button >>Bestellung/Aufträge<< (3).
Please choose from the weeks you want (1).
In the table you see what is available actually devided by weeks (2).
Ordering numbers with no availability only is possible for requests, not for orders.
You want to produce an order now? click the button >>Bestellung/Aufträge<< (3).
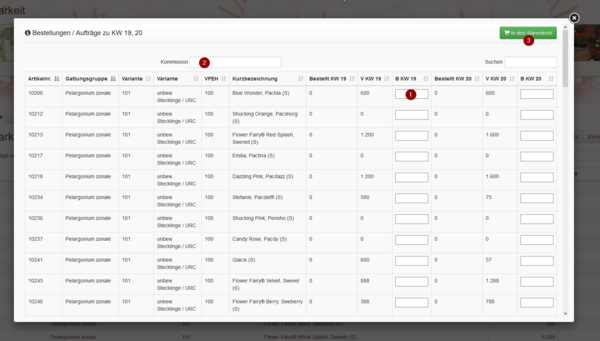
In the window that opens now you write the wanted numbers at the available varieties (1).
If you want you can fill in a commission (2).
For finishing your order please click the button >>in den Warenkorb<< (3) to put it in the "shopping cart".
3.2 Der Warenkorb - the shopping cart
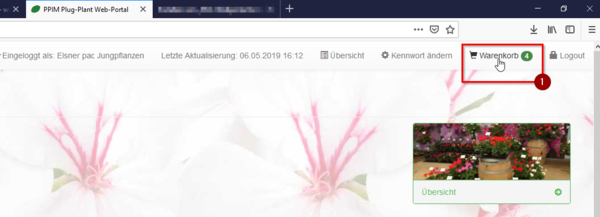
Now please click on the symbol "Warenkorb" (1) top right.
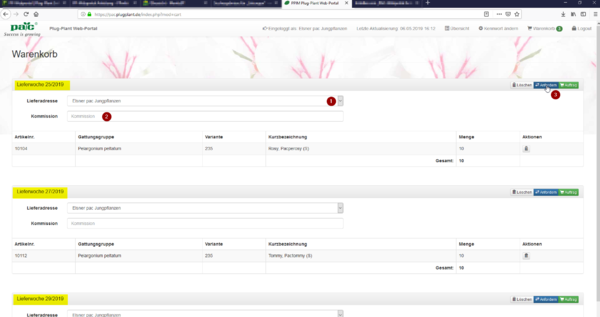
In the shopping cart each delivery week is shown separately (yellow mark).
If we have different delivery addresses of your company you can choose the one you want here (1).
Here as well you can write a special text for commission (2).
Now you can click either at >>anfordern<< to send a request or directly at >>Auftrag<< (3) for an order.
Thsi will be send via email directly to Elsner PAC.
Now the report "Ihr Auftrag wurde erfolgreich bearbeitet." (= your order has been processed successfully.) opens as well as the buttons >>Anzeigen<< (=show) and >>OK<<.
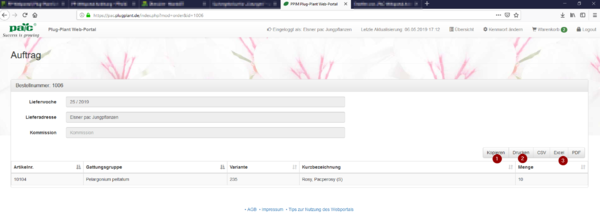
If you click at >>Anzeigen<< the order will be shown clompletely. Now it could be copied (1), printed (2) or saved as Excel- or PDF-file (3).
4 Button >>Übersicht<< - overview
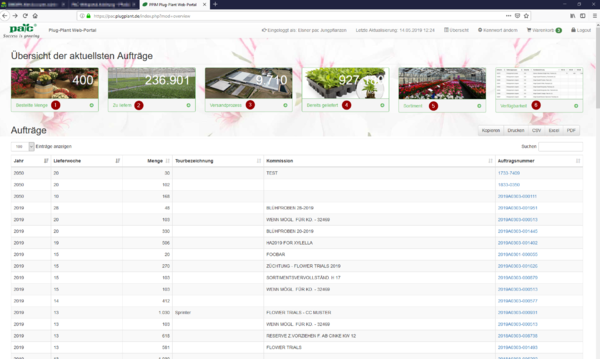
With the button "Übersicht" (1) new buttons will be shown:
- - neu bestellt (just ordered),
- - zu liefern (in production),
- - im Versand (in shipping process),
- - bereits geliefert (already delivered).
The now shown buttons divide the actual orders in:
- - neu bestellt (just ordered) (1),
- - zu liefern (in production) (2),
- - im Versand (in shipping process) (3),
- - bereits geliefert (already delivered) (4).
Furthermore you can get an overview of our assortment (5) or via "Verfügbarkeit" (6) change back to the start page.
4.1 Bestellte Menge - just ordered
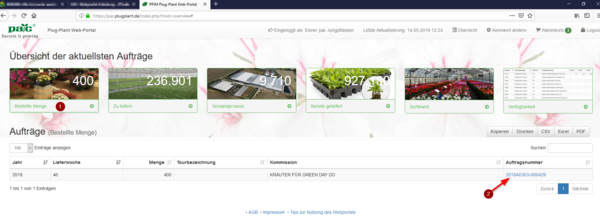
With a click at "Bestellte Menge" (1) you can open a table of your actual orders.
With a click on "Auftragsnummer" (2) (= order number) you can have a look at the details of a special order.
4.2 Aufträge zu liefern - orders in production
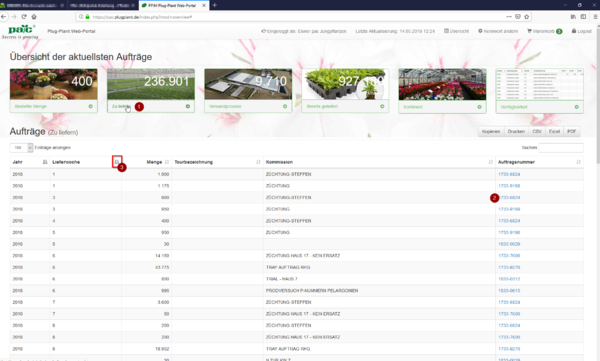
By clicking "zu liefern" (1) you get an overview of the orders which are still in production.
In all those overview windows it is possible to choose the order directly by clicking the "Auftragsnummer" (=order number) (2). Here you can make corrections in the order details.
By clicking the sort-button (3) you can sort by each column up or down.
4.2.1 Auftragsdetails - order details
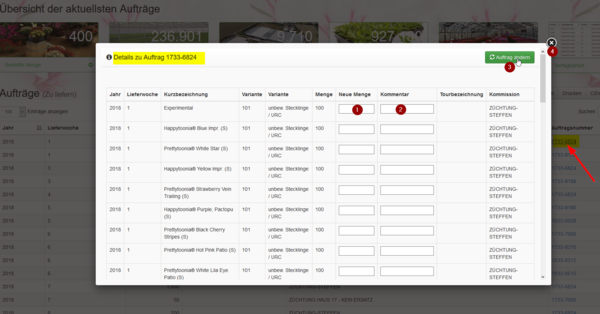
In the window "order details" you can change the quantities yourself later (1) and give appropriate reasons (2).
These changes can be fixed by clicking the button >>Auftrag ändern<< (3) (= change order) before you close the window again (4).
Orders in shipping process or delivered can not be changed any more.
4.3 Versandprozess
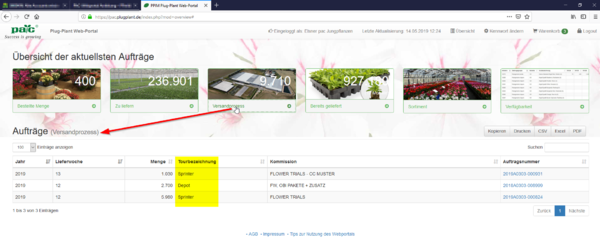
For orders in shipping process the "Tourenbezeichnung" (= name of the tour) will be added.
4.4 Sortiment
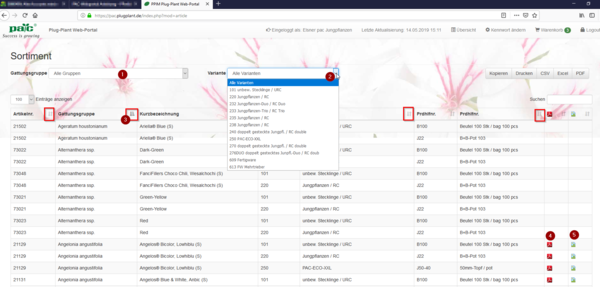
In der Tabelle "Sortiment" bekommen Sie eine Übersicht über unser Angebot. Die Suche kann nach Gattungsgruppe (1) und Angebotsform (2) in Auswahlfenstern verfeinert werden.
Auch in dieser Tabelle besteht die Möglichkeit, in den (hier rot eingerahmten) Sortier-Icons (3) nach jeder Spalte zu sortieren, um die gewünschte Auswahl schneller zu finden.
Für einige Artikelgruppen bieten wir eine kurze Kulturbeschreibung an, die über den PDF-Icon (4) geladen werden kann.
Der Bild-Icon (5) öffnet ein Bild der Sorte dieser Zeile.
5 Datenexport
Rechts unterhalb der Menu-Buttons befinden sich diverse Möglichkeiten zum Datenexport.
5.1 kopieren
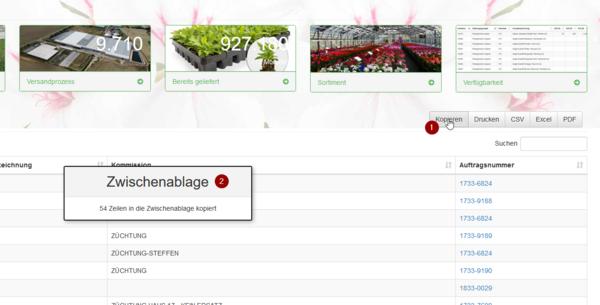
Der Button >>Kopieren<< (1) entspricht in seiner Funktion dem Windows-Befehl Strg + C , jedoch muss vorher keine Markierung des Textes erfolgen.
Es erscheint kurzzeitig eine Meldung "Zwischenablage" (2).
Sowohl in Tabellen als auch in Textprogramme kann nun mit dem Tastenbefehl für "Einfügen" – zum Beispiel Strg + V – oder der "rechten Maustaste" und "Einfügen" der Text aus der Zwischenablage eingefügt werden.
5.2 weitere Exportmöglichkeiten
Mit Klick auf den Button >>Drucken<< öffnet sich das bekannte "Drucken"-Fenster, über das mit Ansteuern des Druckers ein entsprechender Ausdruck erfolgt.
Über die Buttons >>CSV<< und >>Excel<< wird eine Tabelle im jeweiligen Format erzeugt, die über Excel geöffnet oder direkt gespeichert werden kann.
Mit dem >>PDF<<-Button werden die Daten in den Adobe-Reader übertragen.
Außer bei der Zwischenablage öffnet auf Klick von jedem Button ein entsprechendes Fenster zur weiteren Bearbeitung.
