Oracle 19 Client: Unterschied zwischen den Versionen
Aus PPwiki
(Die Seite wurde neu angelegt: „== Installation starten == Achtung: für die Installation des Client ist für PAT der Ordner <code>P:\setup\oracle\NT_193000_client_X32</code> zu verwenden.…“) |
K (→Installation) |
||
| (Eine dazwischenliegende Version desselben Benutzers wird nicht angezeigt) | |||
| Zeile 4: | Zeile 4: | ||
== Installation == | == Installation == | ||
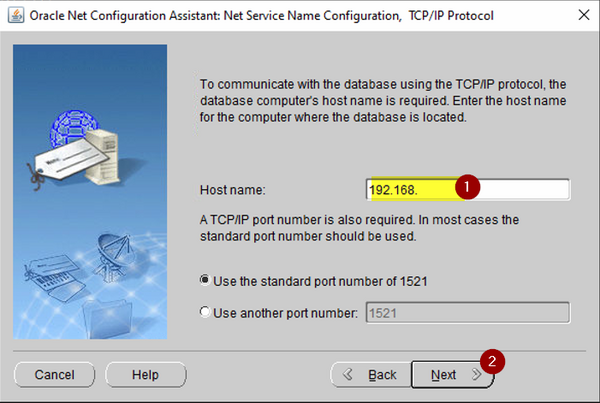
| − | [[File:Oracle19_Client_01.png|border|left]] | + | [[File:Oracle19_Client_01.png|border|left|600px]] |
Die Setup-Datei als Administrator ausführen. | Die Setup-Datei als Administrator ausführen. | ||
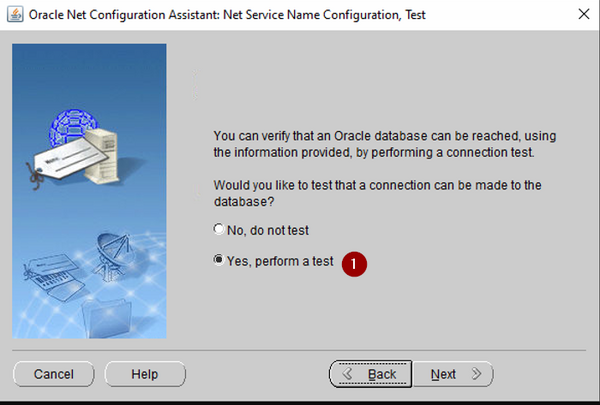
| − | [[File:Oracle19_Client_02.png|border|left]] | + | [[File:Oracle19_Client_02.png|border|left|600px]] |
<br clear=all> | <br clear=all> | ||
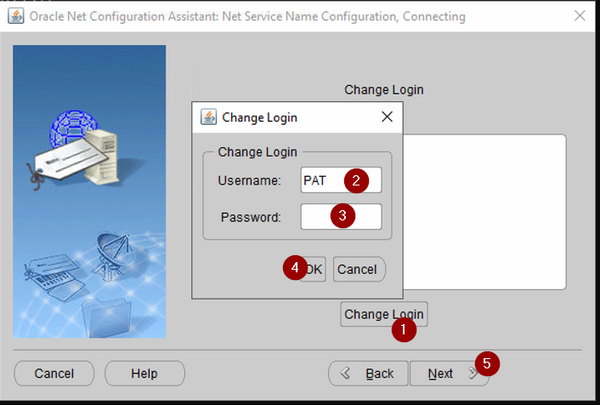
| − | [[File:Oracle19_Client_03.png|border|left]] | + | [[File:Oracle19_Client_03.png|border|left|600px]] |
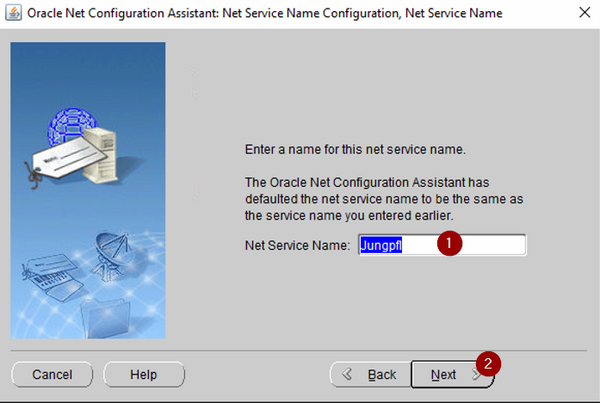
| − | [[File:Oracle19_Client_04.png|border|left]] | + | [[File:Oracle19_Client_04.png|border|left|600px]] |
<br clear=all> | <br clear=all> | ||
| − | [[File:Oracle19_Client_05.png|border|left]] | + | [[File:Oracle19_Client_05.png|border|left|600px]] |
<br clear=all> | <br clear=all> | ||
| − | [[File:Oracle19_Client_06.png|border|left]] | + | [[File:Oracle19_Client_06.png|border|left|600px]] |
<br clear=all> | <br clear=all> | ||
| − | [[File:Oracle19_Client_07.png|border|left]] | + | [[File:Oracle19_Client_07.png|border|left|600px]] |
<br clear=all> | <br clear=all> | ||
| − | [[File:Oracle19_Client_08.png|border|left]] | + | [[File:Oracle19_Client_08.png|border|left|600px]] |
<br clear=all> | <br clear=all> | ||
| − | [[File:Oracle19_Client_09.png|border|left]] | + | [[File:Oracle19_Client_09.png|border|left|600px]] |
<br clear=all> | <br clear=all> | ||
| − | [[File:Oracle19_Client_10.png|border|left]] | + | [[File:Oracle19_Client_10.png|border|left|600px]] |
<br clear=all> | <br clear=all> | ||
| − | [[File:Oracle19_Client_11.png|border|left]] | + | [[File:Oracle19_Client_11.png|border|left|600px]] |
<br clear=all> | <br clear=all> | ||
| − | [[File:Oracle19_Client_12.png|border|left]] | + | [[File:Oracle19_Client_12.png|border|left|600px]] |
<br clear=all> | <br clear=all> | ||
| − | [[File:Oracle19_Client_13.png|border|left]] | + | [[File:Oracle19_Client_13.png|border|left|600px]] |
<br clear=all> | <br clear=all> | ||
| − | [[File:Oracle19_Client_14.png|border|left]] | + | [[File:Oracle19_Client_14.png|border|left|600px]] |
<br clear=all> | <br clear=all> | ||
| − | [[File:Oracle19_Client_15.png|border|left]] | + | [[File:Oracle19_Client_15.png|border|left|600px]] |
<br clear=all> | <br clear=all> | ||
| − | [[File:Oracle19_Client_16.png|border|left]] | + | [[File:Oracle19_Client_16.png|border|left|600px]] |
<br clear=all> | <br clear=all> | ||
| − | [[File:Oracle19_Client_17.png|border|left]] | + | [[File:Oracle19_Client_17.png|border|left|600px]] |
<br clear=all> | <br clear=all> | ||
| − | [[File:Oracle19_Client_18.png|border|left]] | + | [[File:Oracle19_Client_18.png|border|left|600px]] |
<br clear=all> | <br clear=all> | ||
| − | [[File:Oracle19_Client_19.png|border|left]] | + | [[File:Oracle19_Client_19.png|border|left|600px]] |
<br clear=all> | <br clear=all> | ||
| − | Anschließend weiter mit <u>[[ |DMP | + | Anschließend weiter mit <u>[[4)_Dmp-File_anlegen|DMP-File anlegen]]</u> sowie den nachfolgenden Beschreibungen. |
Aktuelle Version vom 15. Januar 2024, 16:47 Uhr
1 Installation starten
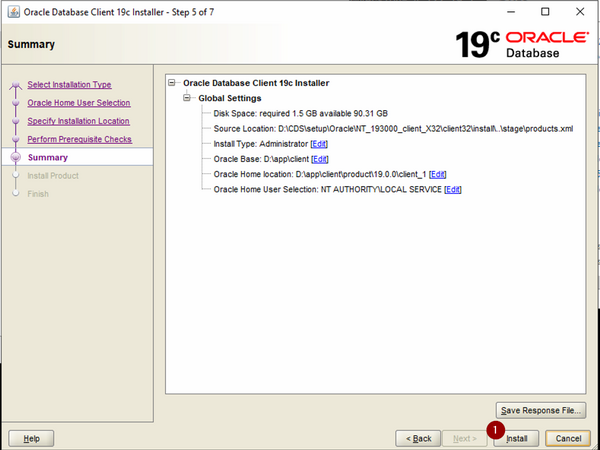
Achtung: für die Installation des Client ist für PAT der Ordner P:\setup\oracle\NT_193000_client_X32 zu verwenden. Dieser enthält die 32Bit-Version.
2 Installation
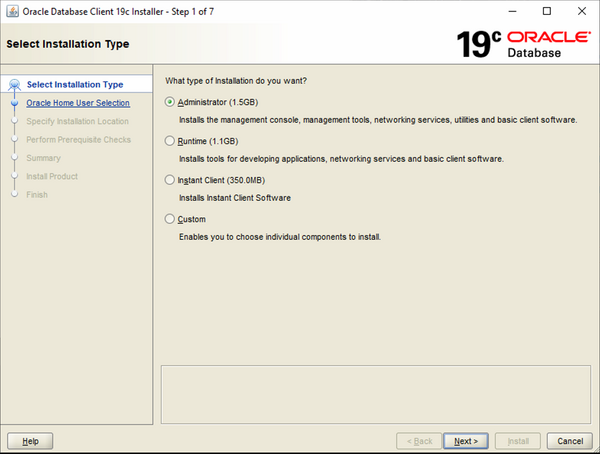
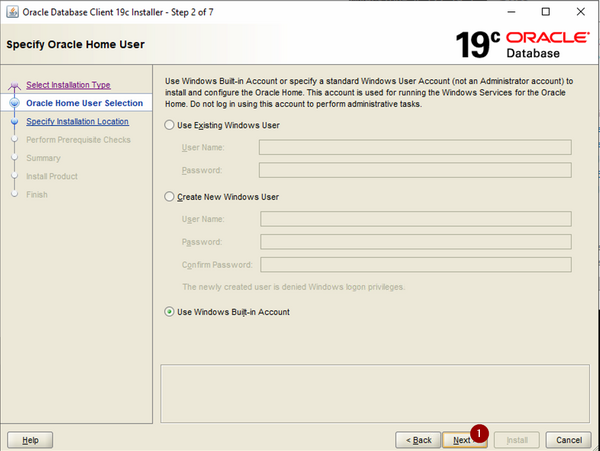
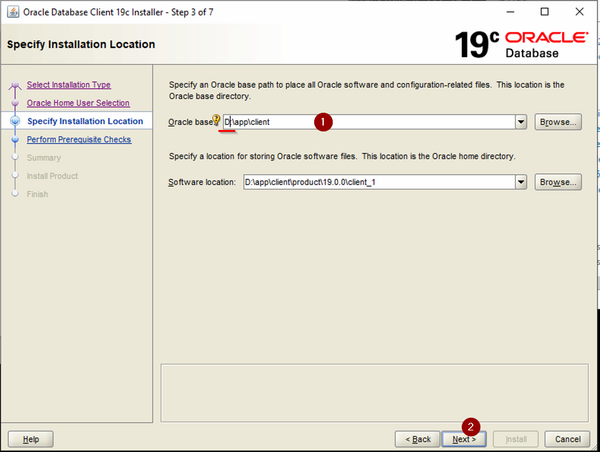
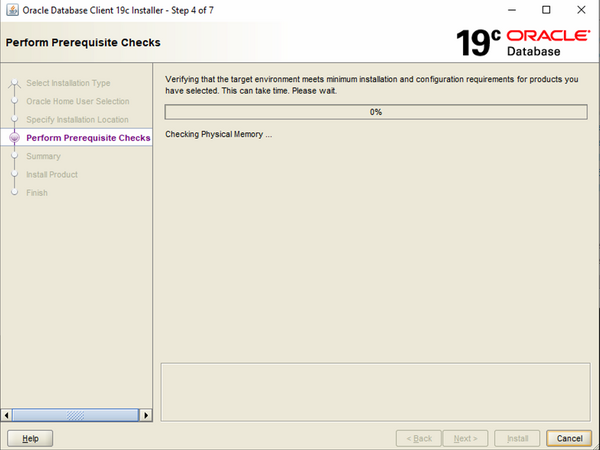
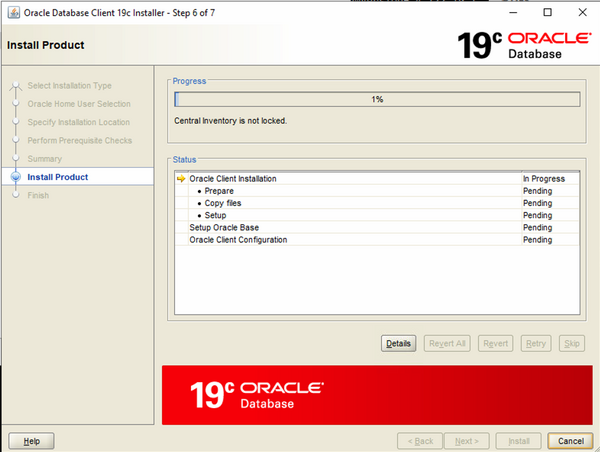
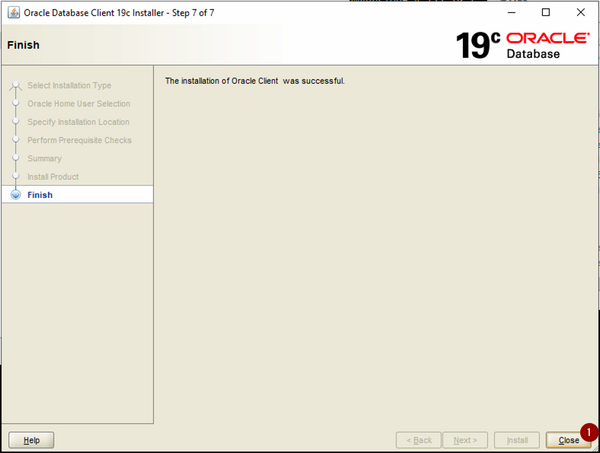
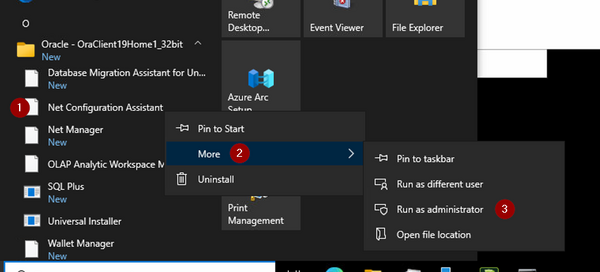
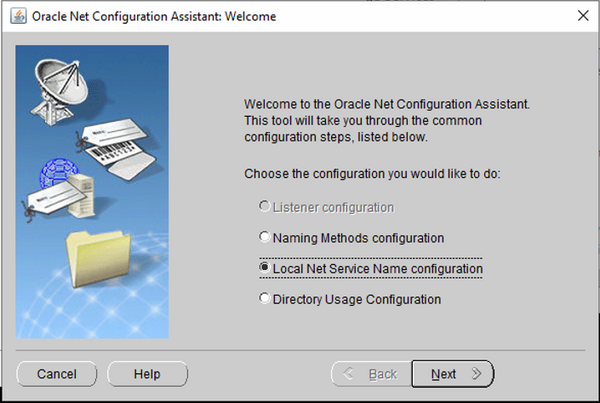
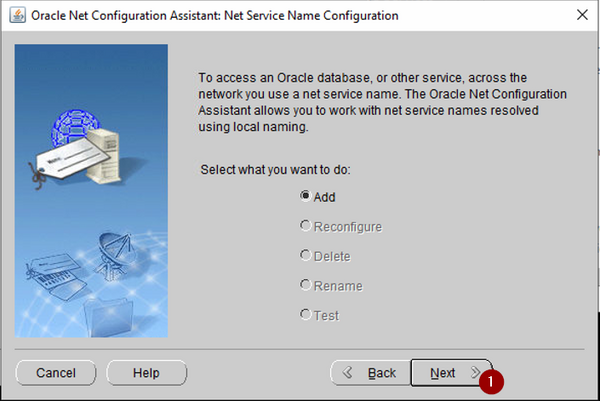
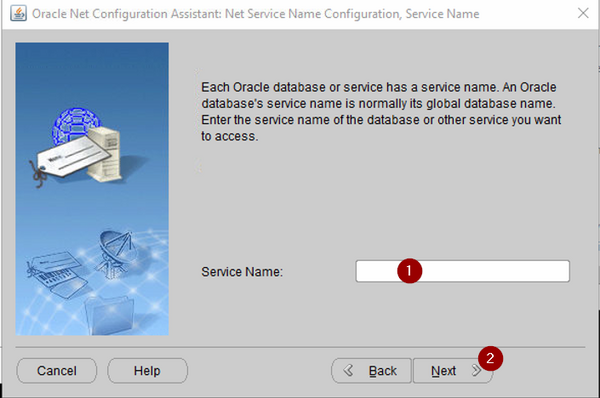
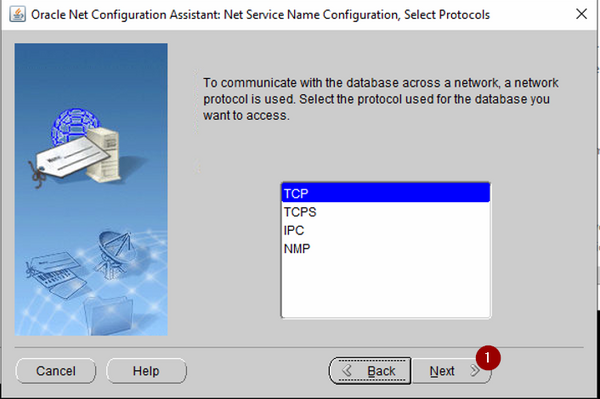
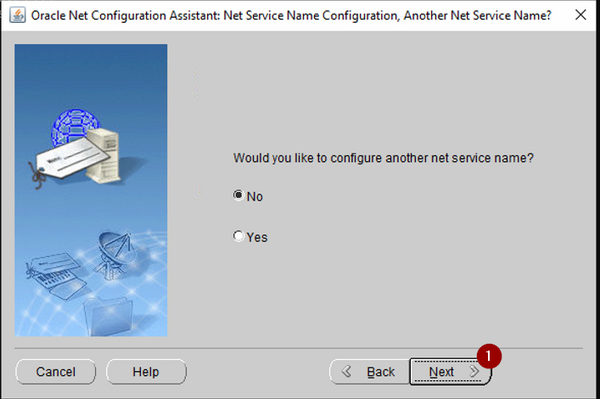
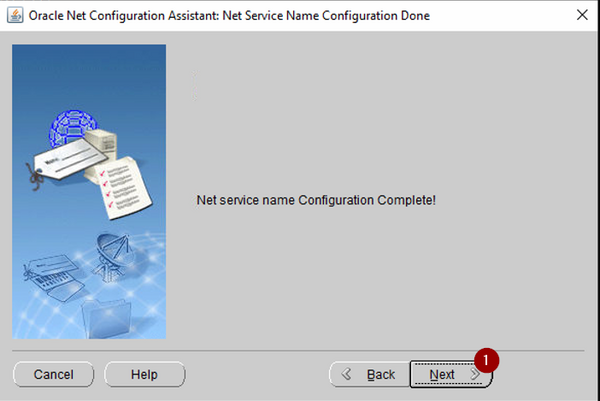
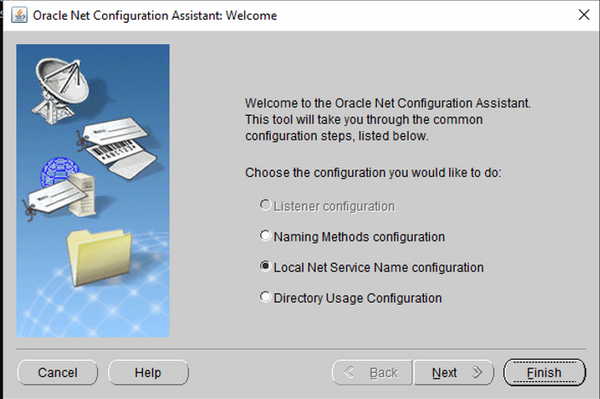
Die Setup-Datei als Administrator ausführen.
Anschließend weiter mit DMP-File anlegen sowie den nachfolgenden Beschreibungen.
